Quantcast
Channel: Develop 1 Limited Blog
Viewing all 296 articles
Browse latest View live

If you’re using ILMerge with your plugins - make sure you read this!

$
0
0

Ever since Microsoft CRM moved online and Plugin sandboxing became mandatory, you'll have likely come up against the challenge of using third party assemblies.

Sand-boxed Plugins cannot access any third-party assemblies and so if you use a NuGet package such as the Microsoft.SharePoint.Client libraries or Newtonsoft's Json.Net then you may have considered or even used ILMerge to embed a copy of the assembly into your compiled Plugin. You may even have used ILMerge to include your own 'common' libraries into your Plugins - even though you could have included the source code. To put it simply - don't do this!

ILMerge is *not* supported!

This is not like the managed/unmanaged solutions or JavaScript vs Business Rules debate. The simple fact is that using ILMerge with Plugins is not supported by Dynamics 365 CE/CDS for Apps.

There is a very old blog post on msdn from back in 2010 about ILMerge that contains this statement from the Dynamics team:

"This post has been edited to reflect that Dynamics CRM does not support ILMerge. It isn't blocked, but it isn't supported, as an option for referencing custom assemblies."

If you do decide to use ILMerge then be warned then you are in dangerous waters! If there is a problem with your environment that is plugin deployment related then the likely answer from Microsoft support is that you'll need to remove your use of ILMerge before your issue can be resolved.

Don't bring me problems, bring me solutions!

One of the most common reasons for using ILMerge I see is when using Newtonsoft's Json.NET. There are many code snippets out there that use this library to parse JSON it to an object graph. Consider the following code for de-serialising Json from the Nest API into a c# object graph:

var nestData = JsonConvert.DeserializeObject<NestData>(json);
public class NestData
{    public Devices devices { get; set; }    public Dictionary<string, Structure> structures { get; set; }
}

The good news is that since .NET 4.0 we've had pretty much the same control over deserialising JSON using the standard class libraries:

using (var stream = new MemoryStream(Encoding.UTF8.GetBytes(json)))
{
    DataContractJsonSerializerSettings settings = new DataContractJsonSerializerSettings()
    {
        UseSimpleDictionaryFormat = true
    };

    DataContractJsonSerializer ser = new DataContractJsonSerializer(typeof(NestData), settings);
    var nestResponse = (NestData)ser.ReadObject(stream);
}

[DataContract]
public class NestData
{
    [DataMember]
    public Devices devices;
    [DataMember]
    public Dictionary<string, Structure> structures;

}

Other libraries that are not included in the .NET Framework (e.g. Microsoft.SharePoint.Client) shouldn't be used. If you can't include the source code in your Plugin, then consider using a loosely coupled Microservices approach to manage your integrations. This way you'll have fully supported lightweight plugins that can offload the heavy lifting outside of the sandbox worker processes.

💡 Keep those Plugins small and lightweight! 💡

Photo by Hafidh Satyanto on Unsplash


Development Tools? You don't always need a UI!

$
0
0

One of the most underused tools in Dynamics and CDS development teams the myriad of those available is the Microsoft.Xrm.Data.PowerShell library by the ever helpful Sean McNellis. If you have to perform repetitive tasks then there is nothing easier but with the unfamiliar nature of PowerShell for those of us that write C# or JavaScript on a daily basis, it's often avoided.

This post is a call to action - consider it as an option for the following reasons:

  1. You can quickly convert Excel spreadsheets into a PowerShell script to perform repetitive tasks such as adding roles to users or entities to solutions.
  2. Easily create reusable scripts that are parameterized without the complexity of a user interface.
  3. Easily automate build tasks and run them over and over again with no chance of human error
  4. Creating scripts to give to other people to run as their user account when you don't have access to the target environment

Recently I needed to add a load of entities to a solution which can be quite cumbersome using the classic solution UI and the PowerApps solution manager doesn't allow you to add entities without their sub-components yet - PowerShell to the rescue.

# Shows how to add entities to a solution

Set-ExecutionPolicy –ExecutionPolicy RemoteSigned –Scope CurrentUser
Install-Module Microsoft.Xrm.Data.PowerShell -Scope CurrentUser
Import-Module Microsoft.Xrm.Data.Powershell
$conn = Connect-CrmOnlineDiscovery -InteractiveMode

Function Add-SolutionComponent
{
    param
    (
        [string]$solutionuniquename,
        [Int32]$componenttype,
        [Guid]$componentid
    )

    # See https://docs.microsoft.com/en-us/previous-versions/dynamicscrm-2016/developers-guide/gg327422(v%3Dcrm.8) 
    $addrequest = new-object Microsoft.Crm.Sdk.Messages.AddSolutionComponentRequest
    $addrequest.AddRequiredComponents = 0
    $addrequest.ComponentType = $componenttype #1=Entity
    $addrequest.DoNotIncludeSubcomponents = 1
    $addrequest.ComponentId = $componentid
    $addrequest.SolutionUniqueName = $solutionuniquename
    $response= $conn.ExecuteCrmOrganizationRequest($addrequest)

}

Function Add-EntitiesToSolution
{
    param
    (
        [string]$solutionuniquename,
        [string[]]$addentities
    )

    Write-Host "Checking that solution exists '$solutionuniquename'"
    $solution = Get-CrmRecords -conn $conn -EntityLogicalName solution -FilterAttribute uniquename -FilterOperator eq -FilterValue $solutionuniquename -Fields solutionid
    $solutionid =  $solution.CrmRecords[0].solutionid

    Write-Host "Querying metdata to get entity id"
    $entities = Get-CrmEntityAllMetadata -conn $conn -EntityFilters Entity -OnlyPublished $false

    # Filter by the entities to add
    foreach($entity in $entities | ? {$_.LogicalName -in $addentities})
    {
        $logicalName = $entity.LogicalName
        $count = (Get-CrmRecordsCount -conn $conn -EntityLogicalName $logicalName -WarningAction SilentlyContinue)
        Write-Host "Adding $logicalName"
        Add-SolutionComponent -solutionuniquename $solutionuniquename -componenttype 1 -componentid $entity.MetadataId
    }
}

# Add lead, account and contact to the solution TestSolution
Add-EntitiesToSolution -solutionuniquename "TestSolution" -addentities "lead","account","contact"

So there you have it! I've picked this scenario because it shows some common things you'll need to use regularly:

  1. Querying for records
    Get-CrmRecords
  2. Executing SDK Messages
    ExecuteCrmOrganizationRequest
  3. Iterating and filtering collections
    foreach($entity in $entities | ? {$_.LogicalName -in $addentities})

So there you have it. Hopefully, you'll consider using PowerShell if you've not already!

You can find lots more samples on Sean's git hub samples repo.

Reasons to use Xrm.WebApi #1 - ETag magic

$
0
0

The Xrm.WebApi client-side SDK has been around for a while now, but you may still be using a hand-built HTTP request to call the WebApi from JavaScript/TypeScript.

ETag magic

Normally when you query the WebApi for a specific record you'll always get a JSON response back that contains the entity field values at the time of the query.

If your code queries the same record using the WebApi many times then this can introduce overhead that will slow down your code. To combat this, we often introduce elaborate caching schemes but this leads to the challenge of keeping the cache current.

The good news is that the Xrm.WebApi SDK already implements a cache for us inside the retreiveRecord call using the ETag.

Consider a call to retrieveRecord as follows:

Xrm.WebApi.retrieveRecord("account","<guid>","?$select=name,parentaccountid")
.then(function(a){console.log(a);})

The first call will retrieve the record from the server including the ETag value

{
    "@odata.context": "https://org.crm11.dynamics.com/api/data/v9.0/$metadata#accounts(name,parentaccountid)/$entity",
    "@odata.etag": "W/\"4400496\"",
    "name": "Sample Account Mon, 31 Dec 2018 10:36:56 GMT",
    "statecode@OData.Community.Display.V1.FormattedValue": "Active",
    "statecode": 0,
    "accountid": "120703f7-e70c-e911-a8c2-0022480173bb",
    "merged@OData.Community.Display.V1.FormattedValue": "No",
    "merged": false
}

The @odata.etag is then used to build a cache of the response that is dependant on the fields that are retrieved.

When you next query for the same record with the same $select attributes the client SDK will send the value of the Etag in the request header:

If-None-Match: W/"4400496"

If the record has not been modified since then the server will return:

HTTP/1.1 304 Not Modified

This indicates that the client side SDK can then reuse the same record that was retrieved previously.

Since it would be quite complex to implement this feature in your hand-build HTTP requests, this is indeed a good reason to use the Xrm.WebApi SDK!

Happy 2019! 😊

DateTimes – it’s never the last word!

$
0
0

Way back in 2011 I blogged about the behaviour of DateTimes in Dynamics CRM (as it was then!). I titled the post 'the last word?' but of course, it's never the last word when it comes to a technology that is always moving forward.

This post aims to explain where we are today with Date & Times fields inside the Common Data Service for Applications (CDS) and PowerApps.

User Local vs. Time Zone Independent

In my previous post, I described the challenges of storing absolute dates such as dates of birth. These dates don't change depending on which timezone you are in. Since then, the PowerPlatform now supports 'Time Zone Independent' dates that will always show the date that they are entered as.

If you choose DateTime as the field type you can then select from 3 'behaviours':

This table summarises the differences between these 3 behaviours:

Field Time

Behaviour

Affected by User Time Zone in PowerApps?

Time Stored in CDS?

CDS WebApi Read/Write uses time zone?

Can be change once set?

Date

User Local

✅*

The time element is set to 00:00 minus the user's time zone offset.

Always UTC

Can change to Date Only or Time zone Independent

Date

Date Only

Date

Time zone independent

Always 00:00 irrespective of time zone

Date & Time

Time zone independent

Time is set to whatever is entered by the user with no adjustments.

Date & Time

User Local

✅*

The time element is set to time entered minus the user's time zone offset.

Always UTC

Can change to Time zone Independent only

*Model Driven Apps use the user's time zone settings. Canvas Apps use the local machine's time zone.

What's the difference between Date (Date Only) and Date (Time zone Independent)?

Given that Date fields should not show a time, why then do we have both a Date Only and Time Zone Independent behaviour for these types of fields. It's not clear why there is a distinction, but the effect is that web service only returns the Date element for Date (Date Only) fields and for Date (Time Zone independent) fields 00:00 is always returned irrespective of the time zone.

In a model-driven app the fields look like:

The WebApi returns 00:00:00Z for the Time zone independent field but not the Date Only field. The formatted values are however identical!

I can't think of any reason why this might be useful other than if there some client behaviour that couldn't deal with date only fields and always needed a time element.

Date Time (User Local) Field Example:

Here is a worked example of the standard behaviour in Date Time User Local fields:


Calculation

Worked Example

Time Zone Offset User 1

𝑎

UTC +10:00 (Brisbane)

Time Zone Offset User 2

𝑏

UTC -10:00 (Hawaii)

Time Entered by User 1

𝑥

20-Jan 14:00

Stored in CDS as UTC

𝑥𝑎

20-Jan 04:00 (14:00-10:00 = 4:00)

Shown in App to User 2

𝑥𝑎 + 𝑏

19-Jan 18:30 (14:00 - 10:00 + (-10:00) = 18:00)

Notice how user 2 sees the date as 19th Jan even though user 1 entered it as 20th Jan.

Date Only (User Local) Field Example:

For Date only User Local fields, the behaviour is the same except the time is set to 00:00 when entering the date. Here is a worked example:


Calculation

Worked Example

Time Zone Offset User 1

𝑎

UTC +10:00 (Brisbane)

Time Zone Offset User 2

𝑏

UTC -10:00 (Hawaii)

Time Entered by User 1

𝑥

20-Jan-19 00:00

Stored in CDS as UTC

𝑥𝑎

19-Jan 04:00 (00:00-10:00 = 14:00)

Shown in App to User 2

𝑥𝑎 + 𝑏

19-Jan 04:00 (00:00 - 10:00 + (-10:00) = 04:00)

Notice here that even though the field is set to Date only it is still affected by the local user's time zone and so the Date shows as the 19th for User 2.

All other field types

For Time zone independent and Date only fields the calculations are simple – the date time returned is the same as entered irrespective of time zone.


Calculation

Worked Example

Time Zone Offset User 1

𝑎

UTC +10:00 (Brisbane)

Time Zone Offset User 2

𝑏

UTC -10:00 (Hawaii)

Time Entered by User 1

𝑥

20-Jan-19 14:00

Stored in CDS the same as entered

𝑥

20-Jan-19 14:00

Shown in App to User 2

𝑥

20-Jan-19 14:00

Model Driven Apps

The behaviour in Model Driven Apps in the UI is simple as shown below (in the same order as the table above).

Canvas Apps

If you build a Canvas app that includes these fields it will look like:

Current issues with the CDS Connector for Canvas Apps:

  1. There is an issue with the Date only User Local behaviour where it shows the time element.
  1. The formatting of the dates will not honour the formatting of the user in their CDS user settings. You will need to manually handle formatting using the CanvasApps field formatting:
  1. The DateTimeZone.Local will use the user's local machine's time zone rather than their CDS user settings time zone and so currently you'll need to manually compensate for this since it could lead to a different date/time being shown in the Model Driven App compared to the Canvas App if the two time zones are different.

These issues will be fixed in a future release of the CDS connector.

WebApi Date Times

When you query, create or update date time fields using the WebApi, remember to always set the value in UTC and compensate for any time zone offsets manually since it will not use the user's time zone at all.

Changing Behaviour

As you can see in the table above, if you have User Local Fields you can choose to change to Date only or Time Zone independent fields which is a one-way process. This does not affect the current values in the database (which will be UTC). New fields will correctly be stored, but you may find that existing values will now show incorrectly because they will be the UTC value original stored in the database. To correct this, you will need to write a conversion program using the ConvertDateAndTimeBehaviorRequest message.

You can find a sample written in c# to change the behaviour here- https://docs.microsoft.com/en-us/dynamics365/customer-engagement/developer/org-service/sample-convert-date-time-behavior

Important: There is a cautionary note here in that you must open and re-save any workflows, business rules, calculated field and rollup field after changing the behaviour of the field.

Read more

There is good documentation on the Common Data Service DateTime fields at https://docs.microsoft.com/en-us/powerapps/maker/common-data-service/behavior-format-date-time-field.

Information about changing date time behaviour - https://docs.microsoft.com/en-us/dynamics365/customer-engagement/developer/behavior-format-date-time-attribute#convert-behavior-of-existing-date-and-time-values-in-the-database 

Are you coming to the D365 UG European Summit?

$
0
0

This year I'm presenting on two topics at the D365 UG European Summit. It's going to be a busy couple of weeks! Next week I'll be hanging out with my MVP friends in Seattle whilst learning about the future of the PowerPlatform and Dynamics 365 from the product team. The following week (27-29 March 2019) I'll be in Amsterdam for the summit. Here are the details of my sessions:

Learn to Convert Your Model Driven App Customisations from JavaScript into TypeScript and Decrease the Total Cost of Ownership

We are in the age of low-code-no-code – so where does JavaScript fit into this brave new world? Maybe you suffer from complex JavaScript that is too fragile to refactor, or maybe you have so much JavaScript you are not sure what is being used and what isn’t. Join Scott to learn how to tame your JavaScript customisations by converting them in to TypeScript. You’ll see how it’s less effort than you thought and how you can unlock the befits of Unit Test and Refactorability.

I'm really excited about this session. I'll be putting on my full geek to show you lots of sample code and where to find more.

Power Platform Demystified (revisited)

You’ve heard about Canvas Apps, Model Driven Apps, CDS for Apps, Power BI and Flow You’re perhaps already using them – but how do they all fit together to form the Power Platform. Join Scott to learn about the amazing journey of how we got from a product called Microsoft CRM to the unique platform that underpins Dynamics 365. You’ll learn about how each part works together so that you can make the right decision when choosing between them as well as they key licensing implications

If you are a member of the D365 UG UK you might have seen me do a similar session - but this time I'll be talking about the latest features that is fast making the PowerPlatform something very, very special indeed...

What is the D365 UG European Summit?

If you've not been to summit before, it has the same vibe as a local chapter meeting by amped x1000! There is high quality content from experts and end-users as well as the chance to network, learn and collaborate with other like minded people!

You can register using one of the following links:

If you are going to be there - I'll be on the medics desk (most likely wearing a white coat) at regular points throughout the 3 days if you'd like to come and chat!

Let’s start TypeScript - Part 3

$
0
0

In part 2 of this series, we looked at debugging our TypeScript after it has been converted from JavaScript. When deploying JavaScript to Dynamics in production, you'll want to ensure that the file is as small as possible. We can do this by 'uglyfying' or 'minifying' our script using gulp. It's also desirable to be able to use multiple TypeScript source files, but compile into a single JavaScript file.

Multiple Source Files compiled into one

  1. Open the tsconfig.json and add the following to the compilerOptions section:
    "outFile": "out/DependantOptionSet.js"
  2. Re build the solution so that the new config is picked up and then make a small change to the TypeScript file - you should now see a new folder out if you refresh the Solution Explorer.
  3. The great part about this is you can now start to split your TypeScript code into multiple source files, remembering that you'll need use the export keyword on the classes to allow them to be used across separate source files.

    TypeScript will automatically order the files as required in the output to ensure that JavaScript can be parsed in the browser.

Minifying our output

  1. Open the command line from the project using Alt-Space.
  2. Install gulp and related tasks using:
    npm install gulp --save-dev 
    npm install gulp-uglify --save-dev 
    npm install gulp-watch --save-dev 
  3. Gulp watch is used to monitor the source file for changes and uglify when it changes.
  4. Create a file of type 'Gulp Configuration File' (search the file types in the add-new dialog) in the root of the project called 'gulpfile.js' and add the following code:
    var gulp = require('gulp');
    var watch = require('gulp-watch');
    var uglify = require('gulp-uglify');
    
    gulp.task('build', function () {
    gulp.src(['./out/SDK.DependentOptionSet.js'])
    .pipe(uglify())
    .pipe(gulp.dest('./WebResources/js'));
    });
  5. Open Tools->Task Runner Explorer
  6. Click 'Refresh on the task runner explorer.
    This should now show you the build task:
  7. Right click on the build task and click Run. This will create a minified version of your output Javascript in the webresources folder.

  8. In the last part of this series, we looked at debugging using Fiddler. Since we've moved our compiled JavaScript, we now need to adjust our fiddler auto-responder to point to the out folder so we can still debug.

    REGEX:(?insx).+\/sdk_\/js\/(?'fname'[^?]*.js)
    C:\Users\Administrator\source\repos\StartUsingTypeScript\StartUsingTypeScript\src\${fname}
  9. We also need to update the auto responder for the source maps since they are now listed in the map file as relative to the out folder rather than absolute paths:
    REGEX:(?insx).+\/sdk_\/src\/(?'fname'[^?]*.ts)
    C:\Users\Administrator\source\repos\StartUsingTypeScript\StartUsingTypeScript\src\${fname}
  10. We can now add a watch task to automatically build the minified version when the source file changes. Add the following to the gulpfile.js:
    gulp.task('watch', function () {
    gulp.watch('./out/*.js', ['build']);
    });
  11. We can manually run the watch to start monitoring the out file – but also configure to automatically start when the project opens.
    Right Click on the watch task -> Bindings -> Project Open

You can download the code from this part if you want to compare your code to mine.In the next part I'll show you how to create some Unit Tests for our TypeScript code.

PowerPlatform.com is for sale*!

$
0
0

*Well ok it's not for sale - but I've got your attention! 😂 Here's my point - it wasn't much over a year ago that it was for sale! Using the waybackmachine and whois history you can see the development of the domain which eventually was bought by Microsoft seemly only in the last year or so. PowerPlatformUG.com was only registered in July 2018. Before Microsoft started using this name, the Power Platform was something to do with the Utility Power sector! Let's consider that - the buzz that is happening around the Power Platform is barely a year old but it's now one of the most talked about topics amongst the Business Applications community. Wow!

At the end of March, I had the pleasure of speaking at and attending the Power Platform summit in Amsterdam. The name seems great - but in reality, it was somewhat aspirational and folks actually registered to attend individual summits. The event was effectively an amalgamation of eXtreme365, the PowerBI, Dynamics365, PowerApps & Flow User Groups. Each speaker had their own background and product/technology focus. Hang on though - isn't that what the PowerPlatform is? A collection of technologies that all come from different backgrounds? Well sure that's where it's come from - but Microsoft are betting on it becoming something that is much more than that.

So what is the PowerPlatform anyway?

James Philips, VP of Business Apps at Microsoft, describes the PowerPlatform in his blog post from just a couple of months ago as a platform to "Analyze, Act, and Automate". He goes on to say that "We do this with Power BI, PowerApps, and Flow, all working together atop your data to help EVERYONE, from the CEO to the front-line workers, drive the business with data."

I don't believe that there was ever a decision whilst Microsoft was working on Dynamics 365, Flow, PowerApps & Power BI to consciously build them in a way that could be unified, but over time it's become clear that the opportunity to combine these technologies together into a democratized digital transformation strategy was huge. Suddenly through this unifying strategy, the harvesting of code from Dynamics 365 to create the Common Data Service (CDS) Microsoft has been catapulted as the leader in the low code sector as defined by the Forester Wave report recently reported by Charles Lamanna. I had the honor of meeting Charles at the recent MVP Summit and I was struck by his sense of vision and ambition to truly revolutionize the area of Business Applications.

Here is my diagram of how the PowerPlatform looks like today:

Do you remember when Dynamics CRM rebranded to Dynamics 365 Customer Engagement? We were all rather confused because the change was in name only. This time it's not just a re-brand, with the PowerPlatform the change is for real! There is both a strategy and technology shift that we've not seen in Business Apps before. It is allowing both Pro-Devs, Functional Consultants & Information workers alike to collaborate together so that technology can be both governed and also productive at the same time. Those two aspects have traditionally been at odds with each other.

Let's look at the google search term stats for the last couple of years:


It's clear that there is a recent increase in activity around Power Platform but it's still tiny compared to other keywords like PowerApps. The Power Platform was launched ever so softly into the wild that it's become somewhat of an enigma with people talking about it but without really knowing where it came from or what it meant. With the Common Data Model announcement at Ignite 2018 (Open Data Initiative collaboration between Microsoft, Adobe and SAP) there was a feeling that the Power Platform was more a philosophy than a product. Maybe just a collective term to talk about Microsoft's collection of technologies that had all been gaining traction in the market, underpinned by some strategic collaborations. 

That was then. Today, Microsoft is clearly pushing the platform more as a way of enabling digital democratization within organizations, with their strapline:

"Empower everyone to innovate with one connected app platform"

From a technology perspective, the Power Platform is the unification of Flow, PowerApps & PowerBI - all underpinned by the Connector ecosystem and the Common Data Service (CDS) that was 'harvested' from the Dynamics 365 for Customer Engagement XRM Platform. Furthermore, it's important to understand that PowerApps is not what it used to be in the days where it was closely coupled with SharePoint. Nor is Flow for that matter. They are now firmly underpinned by the Common Data Service. The unification of these technologies along with the tight integration with Office 365 and Azure makes the PowerPlatform such more than just the sum of its parts.

The Power Platform means something very special in the digital transformation space - it is about the democratization of App Building within a consistent and powerful governed platform. 

Is Dynamics 365 Dead?

In the latter half of last year, http://admin.dynamics.com started to redirect to https://admin.powerplatform.microsoft.com/ - so does that mean that Dynamics is no longer a thing? Not at all. Dynamics 365 now is referred to as 'first party' apps in that it is a set of apps built on the PowerPlatform by Microsoft (check out the top layer in my diagram above). Businesses are free to build their own to compliment or even replicate the Dynamics 365 apps if they wish. As Microsoft invest in the Power Platform adding more enterprise-grade features such as AI and analytics, these first party apps grow in their capability, making the value proposition even greater in the buy vs build decision. 

However, the transformation is not yet complete - take a look at powerplatform.com still redirects to https://dynamics.microsoft.com/en-gb/microsoft-power-platform/ 

...and there's more - the strap-line is "Unlock the potential of Dynamics 365 and Office 365 faster than you ever thought possible."

Dynamics 365 is still very much alive! 

Webhooks for logging

$
0
0

There are times where you'd just like to quickly know what's going on in your CDS instance in 'real time' without filling up your Plugin Trace Log.

Here is a neat way of enabling logging using webhooks:

  1. Goto Webhooks.site (or alternative) and copy your webhooks URL:


  2. Open the Plugin Registration Tool and select Register -> Register New WebHook
  3. Enter a name (it doesn't matter what it is) and paste in the Endpoint URL you copied in step 1.
  4. Register Steps on the messages you are interested (e.g. Retrieve, RetrieveMultiple, etc.) you can even put in filtering entities and attributes if you are interested in specific cases.
  5. Use your CDS instance and watch the messages show in more or less real time!
  6. When you are finished, you can simply disable the steps or delete the webhook.

Hope this helps! 🚀


Error after upgrading to .NET Framework 4.8

$
0
0

If you are coming to the PowerPlatform World Tour in London on the 28th August I'll see you there. Come and see my session on how CDS changes the way we think about building Apps!

Today I'm really busy on an exciting new PowerPlatform project, so just a quick post!.

If you've recently updated Windows 10 to .NET Framework 4.8, you might find when running tools like spkl that you'll get the following exception:

Unable to initialize the native configuration support external to the web worker process (HRESULT=0x80040154).
nativerd.dll must be in %windir%\system32\inetsrv

To resolve this you simply need to open Control Panel -> Programs -> Project and Features -> Turn Windows features on or off

Under .NET Framework 4.8 Advanced Services, turn on WCF Services -> HTTP Activation 

Click OK and everything should work again!


5 Things That Changed How We Think About D365 Implementations - D365UG | Bristol - Summer 2019

$
0
0

I was very privileged to be asked to speak at the first D365UG meeting in Bristol. If you didn't manage to make it, Joel did a fantastic job of recording it so you can watch now!

How do the PowerPlatform API Limits affect Model Driven Apps?

$
0
0

You might have seen the important announcement from the PowerPlatform team about how there are new API limits to be in effect from the 1st October 2019.

We have been somewhat spoilt in past years with very little throttling on how much we can use the API, but now in order to encourage fair usage there will be a limit on how many times you can call the PowerPlatform API in a 24hr period, depending on the license you have:

User licensesNumber of API requests / 24 hours
Dynamics 365 Enterprise applications20,000
Dynamics 365 Professional10,000
Dynamics 365 Team Member5,000
PowerApps per user plan 5,000 
Microsoft Flow per user plan 5,000 
Office licenses (that include PowerApps/Microsoft Flow) 2,000 

(taken from https://docs.microsoft.com/en-us/power-platform/admin/api-request-limits-allocations#what-is-a-microsoft-power-platform-request)

There is a section in the article that calls out what a PowerPlatform Request is and it seems to be quite clear that it's any Connector calls, Flow Step Actions, and CDS API CRUD type calls.

How does this affect Model-Driven Apps and WebApi calls?

One of many improvements of the Unified interface over the legacy Web UI is that it is much less 'chatty' to the server - but there are still ~10 calls for a simple contact form load once metadata has been loaded and cached.

If I filter the network requests to '/api/data/v9' when opening a Unified Client Contact form with no customisations, I get 17 requests:

On examination of these requests, there are some requests that will not count as an API Call:

  • 304 Not modified requests - where data is cached (4)
  • Calls to 'special' actions such as  'GetClientMetadata' which will not count as an API call (2)
  • Calls to UpdateRecentItems (1)

This leaves 10 calls to the Web API endpoint, all of which will count towards the API limit. It's worth noting that the $batch calls only count as a single API Call even though they can contain multiple requests.

What does this mean in 'Real Terms'?

Let's assume the following:

  • A user has a Dynamics 365 Professional license giving them 10,000 API calls/day
  • There are no Flows, CanvasApps, Workflows, Plugins that are running under their user identity
  • There are no customisations made to the standard 'Sales Hub' contact form.
  • There are no other ISV products installed

Assuming this, the user would be able to open approximately ~1000 contact records before they hit the API limit.

This equates to opening ~2 records a minute assuming that the user is opening records constantly for 8 hours straight! 🤣

The good news is that Users will not be blocked if they exceed the limit, the environment administrator will be notified so that they can take action and perhaps purchase an API Limit add-on (details of which are yet to be published but I'll update this post when they are).

Custom vs First Party

The key takeaway here is that the new limits do not differentiate between custom calls to the WebApi made by the out of the box code and custom code. 

Any calls your custom JavaScript makes to Xrm.WebApi.* from inside your Model-Drive Apps will count as an API call alongside the 10 calls we see above.

Call to action!

What does this mean for Model Driven App developers? Well, it's fairly clear that the new API limits are not overly generous, but shouldn't pose too much of an issue for normal users as long as you ensure that you minimize the custom API calls that you make from inside your Model-Driven code. The good news is that the JavaScript Xrm.WebApi already implements etag cache support for you - you can read my blog post about how it'll help you keep your API calls down!

Note: I will update this post if I hear of any changes that come down the line from this announcement. 

Flows now support CDS transactions. Introducing the Changeset Request!

$
0
0

The road from Classic Workflows to Flows has been a long one. Microsoft has been committed to bringing parity to Flow when compared to Classic Workflows. We are almost there but this is only half the story because there is so much more you can do with Flows compared to Classic Workflows. Transaction support is one of those features that Synchronous Workflows inherently supported because they ran inside the execution pipeline, but Asynchronous Workflows left you to tidy up manually if something went wrong halfway through a run. This often led to using Actions to perform specific actions inside a transaction, but wouldn't it be cool if we didn't need to do this? Read on!

Note: Even though the product that was formally known as Microsoft Flow is now called Power Automate, Flows are still called Flows!

So what's a transaction?

At the risk of teaching you to suck eggs, Transactions simply put are a way of executing multiple operations, where if one fails, they all 'roll back' as if they never happened. The 'changeset' of operations is said to be 'atomic' which means that until the transaction is 'committed', no one else can see the records that are created/updated/deleted inside the transaction scope.

Imagine a scenario, where a system needs to transfer a booking from one flight to another where both flights are in very high demand:

  1. ✅ The system cancels the customers current booking
  2. ❌ The system books the new flight, but this fails because the flight is now full
  3. ❌ The system tries to re-book the previous canceled flight, but someone has already taken the seat
  4. 😢 The customer is left with NO flight 

What about a different order of events where the system goes offline halfway through:

  1. ✅ The system books the new flight
  2. ❌ The system cancels the previous flight, but this fails because the system is unavailable
  3. ❌ The system tries to cancel the flight just booked in step 1 because the customer now has two flights, this fails because the system is unavailable
  4. 😱 The customer now has TWO flights!

In both of these situations, without transaction support, we are left having to perform complex 'manual transaction compensation'.  The topic of transactions is fairly complex, and there are lots of other topics such as locking and distributed systems, but simply put, transactions make database consistency easier to manage!

How do Flows now support CDS transactions?

Transactions are called 'changesets' in a Flow. This is a feature that was announced as part of the Wave 2 changes - and it's just landed!

To use changesets, you will need to be using the CDS Current Environment Connector:

Once you have inserted the changeset, you can add the actions that will be part of the transaction. These can only be Create, Update and Delete CDS actions.

In this case, I am going to need to query CDS to get the new flight details, and the details of the booking to cancel. To test, I'll use a flow button that can accept parameters:

We next use the List Records CDS action to get the booking details. We use the Booking Reference to populate the query parameter:

Top tip: You can use Jonas Rapp's awesome FetchXml builder to build Flow Queries. Sara Largerquist has a great post on how to easily do this.

Now that we've got the records we need, we can create the new booking and cancel the previous in a single transaction:

If anything fails in this transaction, nothing will be applied to the CDS database. If I run the flow twice for the same booking reference, the booking is already cancelled and so both actions will fail:

Notice how the 1st action is 'Skipped' because the 2nd action failed. This is the magic of transactions!

My Flow Pledge

I solemnly swear that I will never write another Classic Asynchronous Workflow!

How about you?

@ScottDurow


It's time to add some finishing touches to your PCF controls!

$
0
0

It is wonderful to see so many PCF controls being built by the community.  This post is a call-to-action for all PCF builders - it's time to make sure your PCF component handles read-only and field-level security! The good news is that it's really easy to do. There isn't much in the documentation about this subject, so I hope this will be of help.

Read-only or Masked?

In your index.ts, you first need to determine if your control should be read-only or masked. It will be read-only if the whole form is read-only or the control is marked as read-only in the form properties. It can also be read-only if Field Level Security is enabled. Masked fields are where the user doesn't have access to read the field due to the Field Security Profile settings. Typically masked fields are shown as *****.

// If the form is diabled because it is inactive or the user doesn't have access
// isControlDisabled is set to true
let readOnly = this._context.mode.isControlDisabled;
// When a field has FLS enabled, the security property on the attribute parameter is set
let masked = false;
if (this._context.parameters.picklistField.security) {
  readOnly = readOnly || !this._context.parameters.picklistField.security.editable;
  masked = !this._context.parameters.picklistField.security.readable;
}

Pass the flags to your control

I use React for my control development and so this makes it really easy to pass the details into the component. You'll then need to ensure your control is disabled or masked when instructed to.

ReactDOM.render(
  React.createElement(PicklistControl, {
    value: this._selectedValue,
    options: options,
    readonly: readOnly,
    masked: masked,
    onChange: this.onChange,
  }),
  this._container,
);


Testing the result!

Here I have a simple picklist PCF control. It is associated with two Optionset fields. One normal, and one with Field Level Security:

The 'Secured Optionset' field is masked because the associated Field Security Profile has 'No' on the 'Read' setting. This causes the readable property to be false.

If we toggle this to 'Yes' the field will be readable, but not editable because 'Update' is set to 'No':

If we then set Update to 'Yes' we can then edit both fields:

Finally, let's deactivate the whole record. This will then show both fields as read-only - irrespective of the Field Security!

You can see that the record is read-only by the banner at the top of the record:

Call to action!

If you have any PCF controls out there, it's time to re-visit them and check they handle read-only and Field Level Security settings.

@ScottDurow

SalesSpark and the Power Apps Component Framework!

$
0
0

Yesterday we announced our new product, SalesSpark, the Sales Engagement platform built natively upon the PowerPlatform 🚀 I've been working on this product for the last few months and have been really impressed with what the Power Apps Component Framework (PCF) can do for Model Driven Power Apps. In the past, the only way to extend Apps was to include custom HTML Web-resources. My open-source project SparkleXrm made this easier by including libraries for building grids, and controls that acted like the out of the box controls. With the availability of PCF, the landscape has shifted and so will the direction of SparkleXrm.

To build SalesSpark we have used the power of the office UI fabric which is built upon React. Just like SparkleXRM, we use the MVVM pattern to create separation between UI rendering logic and the ViewModel logic. 

In this post, I wanted to share just a few features of SalesSpark that I'm really happy with! 😊

PCF means breaking free from IFRAMEs!

At the heart of SalesSpark are Sequences - these are a set of steps that act as your 'Virtual Assistant' when engaging with prospects. SalesSpark connects to your mailbox, and sends and replies to emails directly inside Office 365. We had to build a Sequence Designer that allows adding emails using templates. One of the user experience patterns that has always been impossible when using Html Web-resources was the popup editor. This was because you were never allowed to interact with the DOM. Since the PCF team now support the office UI fabric, those constraints have gone away, allowing us to create a really cool sequence editor experience:

PCF allows Drag and Drop!

These days, everyone expects things to be drag and dropable! This again has always been a challenge with 'classic' HTML Web-resources. With PCF we were able to create a variety of drag and drop user experiences:

Not only can you drag and drop the sequence steps, but you can also add in attachments to emails. The attachments can be 'traditional' email attachments or cloud download attachments that allow you to monitor who has opened them from your email. Also, notice how the email can be created without saving it, the attachments are then uploaded when you are ready to send or you save the email.

PCF is great for Visualizations

In addition to the user experience during data entry, PCF is great for introducing visualizations that make sense for the data you are monitoring. With SalesSpark, when you add contacts to a Sequence, you then want to monitor how things are progressing. We made the sequence editor not only allow you to build sequences but also monitor the progress - allowing you to make changes as it runs.

PCF and the Data Grid!

I think the most exciting part of PCF for me is that it allows extending the native Power Apps experience rather than replacing it. With HTML Web-resources, once you were there, you had to do everything. Using PCF fields on a form means that you don't have to worry about the record lifecycle or navigation. Adding a PCF control to a view means you get all the command bar, data loading and paging for 'free'.

The SalesSpark data grid control implements lots of additional features to extend the native data grids. You get infinite scrolling and grouping, as well as custom filtering experience.


Chart Filtering

And of course, because it's a Grid as far as Power Apps is concerned - you can use the Chart filtering - here I am using a Chart to filter the list to show contacts that have no stage set on them so that I can add them to a Sequence:

I hope you'll agree that the PCF unlocks so much potential in Power App Model-Driven Apps that we simply couldn't access before!

Watch this space for some more exciting things to come! 🚀
Learn more about SalesSpark

@ScottDurow

P.S. If you've any questions about the PCF, just head over to the PCF forums where you'll often find me hanging out with other like-minded PCF developers like TanguyAndrew, and Natraj - and what's more the Microsoft PCF product team is always available to answer those really tough questions!

MVP Advent Calendar - Smart Buttons for the Unified Interface

$
0
0

Happy 21st December!

The chestnuts are roasting, and the snow is falling (somewhere I'm sure). It's that festive time of year again, and with it, a new year is beckoning. We all know that the biggest event of 2020 will be the retiring of the 'classic' user interface in Power Apps and Dynamics 365. To make sure you are ready for this, my gift is an updated version of Smart Buttons that is fully supported on the Unified Interface. It also includes a new smart button 'WebHook' that can be used to call HTTP Triggered Flows.

What are Smart Buttons?

Smart Buttons are a feature I introduced into the Ribbon Workbench a while ago to make it easier to add buttons to the Model Driven App Command Bar without needing to create JavaScript Web resources.

To enable Smart Buttons in your environment, you will need to install the Smart Button Solution and then it will light-up the Smart Buttons area in the Ribbon Workbench. 

There are 4 Smart Buttons at the moment (but you could easily create your own if you wanted!):

  • Run Workflow: Create a workflow short cut and then optionally run code when it has finished. Run Workflow can be added to Forms or Grids.
  • Run WebHook: Create a button to run a WebHook (such as an HTTP Flow). Run WebHook can be added to Forms or Grids.
  • Run Report: Create a report short-cut button on forms.
  • Quick JS: Add a quick snippet of JavaScript to run on a button without creating separate web resources. Think of this as the 'low code' way of adding Command Buttons!

Quick JS

Megan has used this Smart Button before and asked me if it can support the formContext way of accessing attribute values rather than the deprecated Xrm.Page. Well, the good news is that it now can!

You could add some JavaScript to set a value on the form and then save and close it:

context.getAttribute("dev1_submission_date").setValue(Date());
context.data.entity.save("saveandclose");

In the Ribbon Workbench this is easy to do:

Once you've published, you now have a button to run this 'low code' on the form:

Literally you could use this for infinite possibilities where you need to make a small change to the form before saving it - just when a user clicks a button. You could even trigger a workflow or a Flow on the change of the value!

Run Workflow

The Run Workflow button has had a makeover too - it now gives much better feedback when running workflows (both sync and async) and you can run some simple JavaScript if there is a problem:

The Workflow that this is running simply updates a field on the record with the current date:

Once you've published, this looks like:

You can see that now the grid is automatically refreshed for you too! This button can also be added to forms or subgrids on forms.

Run WebHook

If you have a Flow that is initiated by an HTTP request, you can use this Smart Button to call the Flow on a list of records. Imagine you had a Flow that has a 'When a HTTP request is received'. You can copy the HTTP Post url and provide the input JSON to receive an id string value of the record it is being run on.

As you can see, this Flow simply updates the account record and then returns OK.

Inside the Ribbon Workbench, you can then add the WebHook smart button:

Notice the Url is pasted in from the Flow definition. Eventually, once Environment Variables have come out of preview, I will update this to receive an environment variable schema name so that you can vary the URL with different deployments. That said, I also hope that this kind of functionality will become supported natively by the Flow integration with Model Driven Apps so that we can programmatically run a Flow from a Command Button in a fully supported way. Until then, once you've published you'll be able to run the flow on multiple records:

Again, once the Flow has been run, the grid is refreshed. This button can also be included on Sub Grids on forms or the form command bar it's self.

A little bit of DevOps

When I first wrote the Smart Buttons solution, I set it up in Azure DevOps to automatically build and pack into a solution. This made it so much easier when I came to do this update. Doing DevOps right from the beginning really pays dividends later on! You can head over to GitHub to check out the code which is now written entirely in TypeScript and uses gulp and spkl to do the packing (If you are into that kind of thing!).

Well, there you have it - hopefully, this will help you with the move to the UCI if you are already using Smart Buttons, and if you are not then you might find a need for them in your next Demo or when needing to quickly create Command Bar short cuts. If you are upgrading from the old version, it will mostly work with and in-place update, but you will need to add the extra two parameters on the Run Workflow smart button. The easiest would be to remove the old button and re-add it. Oh yes, and the Run Dialog smart button is no longer included because they are not part of the UCI!

>> You can grab the updated Smart Button solution from github too <<

Merry Christmas to one and all! ❤

@ScottDurow


Adding the PowerApps Solution Checker to your Azure DevOps Pipeline

$
0
0

Continuous Integration and Delivery is somewhat passé these days, but what is often missed is the need for good tests and analysis in your build pipeline. The PowerApps team has been working hard on the Solution Checker over the last year, and it's become an essential part of every PowerApps solution development process. If you have a solution that is going to be put into App Source, you'll need to make sure it passes a special set of rules specifically for App Source solutions.

This post shows you how to add the Solution Checker to your Build pipeline.

Step 1 - Application User

Before you can run the solution checker PowerShell module, you'll need to create an Application User in your Azure Active Directory Tenant. There is a great set of instructions in the PowerApps Solution Checker documentation - https://docs.microsoft.com/en-gb/powershell/powerapps/get-started-powerapps-checker?view=pa-ps-latest

Step 2- PowerShell Script

So that our Build Pipeline can run the Solution Checker, we add a PowerShell script to our repo. 

Note that you'll need to:

  1. Create a secured variable in your pipeline to store the client secret so it can be passed to the script as a parameter.
  2. Update for your Tennant and Application ID 
  3. Update for the location of your solution.zip that you've built in the pipeline. Mine is 
    $env:BUILD_SOURCESDIRECTORY\DeploymentPackage\DeploymentPackage\bin\Release\PkgFolder\Solution.zip

Your Script should look something like:

param (
    [string]$clientsecret
 )
# Requires App User be set up https://docs.microsoft.com/en-gb/powershell/powerapps/get-started-powerapps-checker?view=pa-ps-latest
$env:TENANTID = "65483ec4-ac1c-4cba-91ca-83d5b0ba6d88"
$env:APPID = "2fa068dd-7b61-415b-b8b5-c4b5e3d28f61"

$ErrorActionPreference = "Stop"
install-module Microsoft.PowerApps.Checker.PowerShell -Force -Verbose -Scope CurrentUser

$rulesets = Get-PowerAppsCheckerRulesets
$rulesetToUse = $rulesets | where Name -NE 'AppSource Certification'

$analyzeResult = Invoke-PowerAppsChecker -Geography UnitedStates -ClientApplicationId "$env:APPID" -TenantId "$env:TENANTID" -Ruleset $rulesetToUse `
    -FileUnderAnalysis "$env:BUILD_SOURCESDIRECTORY\DeploymentPackage\DeploymentPackage\bin\Release\PkgFolder\Solution.zip" `
    -OutputDirectory "$env:BUILD_SOURCESDIRECTORY" `
    -ClientApplicationSecret (ConvertTo-SecureString -AsPlainText -Force -String $clientsecret)

# Unzip and results
Expand-Archive -LiteralPath "$($analyzeResult.DownloadedResultFiles.Get(0))" -DestinationPath "$env:BUILD_SOURCESDIRECTORY" 

#Rename
$extractedFile = $($analyzeResult.DownloadedResultFiles.Get(0))
$extractedFile = $extractedFile -replace ".zip", ".sarif"
Rename-Item -Path $extractedFile -NewName "PowerAppsCheckerResults.sarif"

If ($analyzeResult.IssueSummary.CriticalIssueCount -ne 0 -or $analyzeResult.IssueSummary.HighIssueCount -ne 0) {
Write-Error -Message "Critical or High issue in PowerApps Checker" -ErrorAction Stop
}

You can change the ruleset and add overrides as per https://docs.microsoft.com/en-gb/powershell/module/microsoft.powerapps.checker.powershell/Invoke-PowerAppsChecker?view=pa-ps-latest

Step 3 - Call and Collect Results in your build pipeline

I'm assuming that you are using AzureDevOps YAML pipelines. If not, I'd recommend you do it because it makes source control and versioning of your pipelines so much easier.

I have three tasks for the Solution Checker as follows:

# PowerAppsChecker
- task: PowerShell@2
  displayName: Solution Checker
  inputs:
    filePath: 'BuildTools\BuildScripts\SolutionChecker.ps1'
    arguments: '"$(ClientSecret)"'
    errorActionPreference: 'continue'

- task: CopyFiles@2
  displayName: Collect - Solution Checker Results
  inputs:
    Contents: '**/PowerAppsCheckerResults.sarif'
    TargetFolder: '$(Build.ArtifactStagingDirectory)'

- task: PublishBuildArtifacts@1
  displayName: Publish CodeAnalysisLogs
  inputs:
    PathtoPublish: '$(Build.ArtifactStagingDirectory)/PowerAppsCheckerResults.sarif'
    ArtifactName: 'CodeAnalysisLogs'
    publishLocation: 'Container'

The first task runs the PowerShell script, and the second and third collects the results so that we can report on them.

To ensure that the $(ClientSecret) parameter is provided, you need to add a pipeline variable for the same:

Step 4 - Reporting the results

The Solution Checker outputs the results in a 'Static Analysis Results Interchange Format' (SARIF) which is a standard format. There are various viewers you can use, but I find having the results directly in the pipeline very useful. 

You will need to install the 'Sarif Viewer Build Tab' - https://marketplace.visualstudio.com/items?itemName=sariftools.sarif-viewer-build-tab

Once you've got this working, it'll scan your build artifacts for a sarif file and show the results!


So that's it! When you run your pipeline (which I recommend you do every time a new commit is made to the source branch), the solution will be automatically run through the solution checker, and if there are any critical issues, the build will fail.

If you do find that there are some critical issues that are false positives (which can happen), you can exclude those rules by modifying your script to something like:

$overrides = New-PowerAppsCheckerRuleLevelOverride -Id 'il-avoid-parallel-plugin' -OverrideLevel Informational

$analyzeResult = Invoke-PowerAppsChecker -RuleLevelOverrides $overrides `
...

Hope this helps!

@ScottDurow

#ProCodeNoCodeUnite

$
0
0

Technology typically leads to polarized opinions. Always has…Vinyl/CD…Betamax/VHS…HD-DVD/Blu-ray… Of course, our minds know that it depends on the detail, but our hearts have preferences based on our experience. This product over that one. This technique over this new one. You like this tool better than theirs because you know and trust it. You do this, don’t you?!

Imagine you are implementing a new solution for a customer and you are asked to choose between a Flow or a Plugin for a new piece of functionality. If you are a pro-coder, then naturally you will find the Plugin option the most attractive because you trust it – later you might decide it’s over-kill and decide that it can be done using a Flow. If you are a functional consultant who is only too aware of the total cost of ownership of ‘code’ then you’ll try and achieve the functionality with a Flow, but then you might find it becomes too complex and needs a Plugin. You naturally start with a position that you know best. Am I right?!

We know there are thousands of variables that affect our ultimate decision – different people will end up at different decisions and the ‘side’ you start from might affect the outcome. But one thing is for sure – building software is far from simple!

The Microsoft Power Platform 'Code or No Code' battle has been bubbling away for at least a year now. It’s an unfortunate mix of sweeping statements about not needing code anymore resulting in passive-aggressive comments from Pro-Coders about how they got you here in the first place.

Not everyone gets it

Sara Lagerquist and I did a mock 'fight' at the recent Scottish Summit 2020. We demonstrated the polarised viewpoints in an attempt to make see the futility of it. But not everyone gets it...

If you’re from the older Model-Driven Apps space, then you’ll be very used to having to make choices between JavaScript or Business Rules, between Workflows or Plugins. But if you’re from the newer ‘Low Code’ Canvas App space, then it’s possible that you don’t see any of this as a problem! Why would you use code when you are told ‘Less Code – More Power’? It’s not even an option – so what’s the big deal? Why would anyone want to argue? But trust me, they do!

Human nature

Why is all this happening? Simple, because of human nature. It’s only natural to react to something that threatens our thoughts and ideas with a response that's at best, defensive, or at worst, passive-aggressive. It has nothing to do with technology, or code/no-code. It has everything to do with the ‘tribal’ attitudes that have started to emerge. This problem is no one's fault - but rather an unfortunate side-effect of successful online community building centered around the different parts of the Microsoft Power Platform.

I'm guilty too!

I am guilty of this too. I am an enthusiastic evangelist of the PowerPlatform and its no-code/low-code aspects – but still when I see the weaponizing of hashtags like #LessCodeMorePower - I get defensive. I’ve worked hard my entire professional career to get proficient at code – now someone is saying that solutions have more power with less of me? No way!

I’m sure you can see my knee-jerk reactive is misguided. Being condescending towards code is not the intention of the hashtag – but my human psyche kicks in telling me “I don’t like it”.

The secret to letting go

So here’s the secret - the #LessCodeMorePower mantra is actually nothing to do with us! That’s right – it’s not about YOU or ME. It’s about how Microsoft is positioning their product in the market. It's how they are selling more licenses. Nothing has changed – this journey has been going on for a long time – it’s just the latest leap in abstraction. Technology will always move on and change – and that’s why we love being in this industry. Right?

Now, let’s take a step back. We all have a shared love for the Microsoft Power Platform. Building software solutions is hard. Picking the most appropriate technology is hard. The right decision today may not even be true tomorrow! 

How do we move forwards?

Pro-coders: When you see #LessCodeMorePower social media posts – work at avoiding being defensive – don’t respond by protecting your corner. This isn’t a criticism of you – you are just experiencing the force of the Microsoft marketing machine. Microsoft is not saying you are no longer needed or that code can’t create powerful solutions. The Microsoft Power Platform needs code as much as it needs no-code - and in fact, that is one of its strengths over our competitors!

Low-coder/No-coders: Make sure you use #LessCodeMorePower hashtag appropriately. Be considerate of all perspectives – is it really the right use? Use it to promote specific strengths of the Power Platform but not at the expense of making pro-coders defensive. Don’t just say ‘anyone can write apps’ or ‘it’s simple to develop software’ – put these powerful statements in context! You don’t really believe in those overly simplistic ideals without adding at least some caveats! Promote the platform, but not at the expense of your fellow community members.

The unbreakable oath

Overall, let’s all be considerate of the whole spectrum of our software development profession. Pro-Coders, Low-Coders, and No-Coders - encouraging one another rather than creating division. Together, let’s unite and make the Power Platform shine.

Here is the oath that Sara and I took at #SS2020 – join us!

I do solemnly swear…on Charles Lamanna’s face…
To love, honor & respect all those who develop solutions on the Microsoft Power Platform.
To encourage one another through difficult projects.
To build mutual respect between no-coders, low-coders, and pro-coders.
Together, promoting quality through collaboration and cooperation.

@ScottDurow #ProCodeNoCodeUnite

Failed solution upgrade applying 2020 release wave 1

$
0
0

When applying the 2020 release wave 1 you may see a component such as the Dynamics 365 Core Service fail to complete.
First, you may want to check that you have correctly followed the steps on how to opt-in for 2020 wave 1.

To determine the issue - navigate to the solution manager in PowerApps and click 'See History'

This should then show you the failed upgrade component:

Clicking on the row will give you the details. In my case it was because the solution was blocked due to a previous upgrade being incomplete:

Solution manifest import: FAILURE: The solution [FieldService] was used in a LayerDesiredOrder clause,
but it has a pending upgrade.
Complete the upgrade and try the operation again.

To resolve this, you will need to navigate to the solution manager and click 'Switch Classic'. Locate the referenced solution that is still pending an upgrade, select it, and then click 'Apply Solution Upgrade'.

Wait for the upgrade to be applied, then return to the 2020 wave 1 release area in the admin portal, and click 'Retry'

If you see a subsequent error, you can repeat these steps for the failed solution.

Hope this helps!

NetworkView re-written using TypeScript and PCF

$
0
0

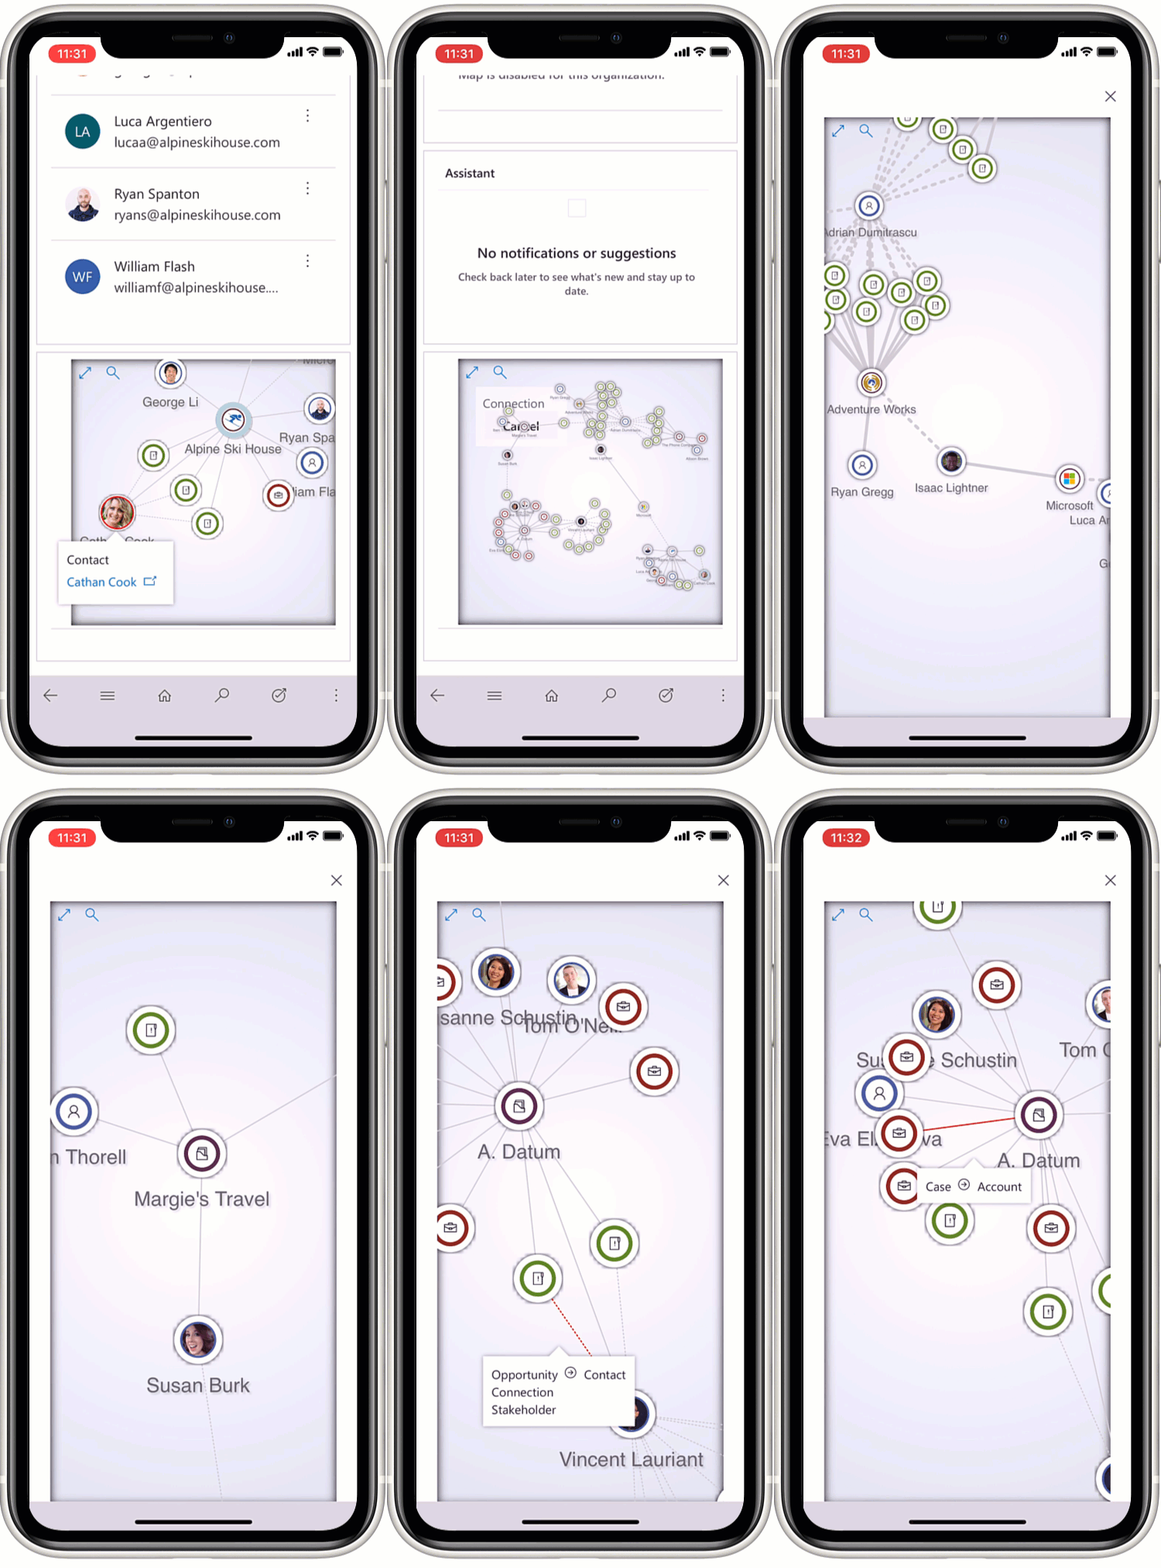
Back at the end of 2015, Power Apps wasn’t even a thing. My world revolved around Dynamics 365 and the release cadence that was bringing us updates to the platform that were either keeping up with SalesForce or providing greater customizability. Much has changed since then, not least the way that we write rich UI extensions. With this in mind, I have completely re-written my Network View solution to use TypeScript and the Power Apps Component Framework.

Mobile App Demo

This version has some notable improvements on the old version:

  • ✅ Shows details of links
  • ✅ Allows including inside the actual form (thanks to PCF)

There are a few more items TODO to bring parity with the old version:

  • 🔳 Loading Activities
  • 🔳 Showing the users/connection roles for the network
  • 🔳 Support for configurable information cards

The source can be found at https://github.com/scottdurow/NetworkViewPCF 

I've not released a pre-compiled solution (yet) - if you would like to test it out, please get in touch!

@ScottDurow


Debugging Canvas App PCF components with fiddler

$
0
0

Those of you who know me will also know that I am a massive Fiddler fan for removing the need to deploy each time you change your JavaScript source.

Here are some of my previous blog posts on Fiddler - http://develop1.net/public/search?q=fiddler

The PowerApps docs now even include instructions on it https://docs.microsoft.com/en-us/powerapps/developer/model-driven-apps/streamline-javascript-development-fiddler-autoresponder

Developing PCF Canvas Controls

When developing PCF controls for Canvas Apps, the process is slightly different and includes an extra step.

1. Add an autoresponder in the format:

Resources0Controls0<NamesSpace>.<ControlName>.bundle.js?sv=
E.g. Resources0Controls0Develop1.PCFTester.bundle.js?sv=

It should look something like:

2. Since the scripts are served from a different domain to PowerApps, configure Fiddler to add the Access-Control-Allow-Origin header.

In fiddler, Press Ctrl-R to open the rules editor.

Locate the OnBeforeResponse function and add:

if (oSession.oRequest.headers.Exists("Host") && oSession.oRequest.headers["Host"].EndsWith("windows.net")) {
  if (oSession.oResponse.headers.Exists("Access-Control-Allow-Origin")){
    oSession.oResponse.headers["Access-Control-Allow-Origin"] ="*";
  }
  else{
    oSession.oResponse.headers.Add("Access-Control-Allow-Origin","*");
  }
}

It should look something like:


When you add in your PCF Component to the Canva App, it should now be loaded from your local file system just like it does with Model Driven Apps. To refresh the component, you will need to exit the app and re-open (rather than just refresh the window in Model Driven Apps).

Hope this helps,

@ScottDurow

Viewing all 296 articles
Browse latest View live